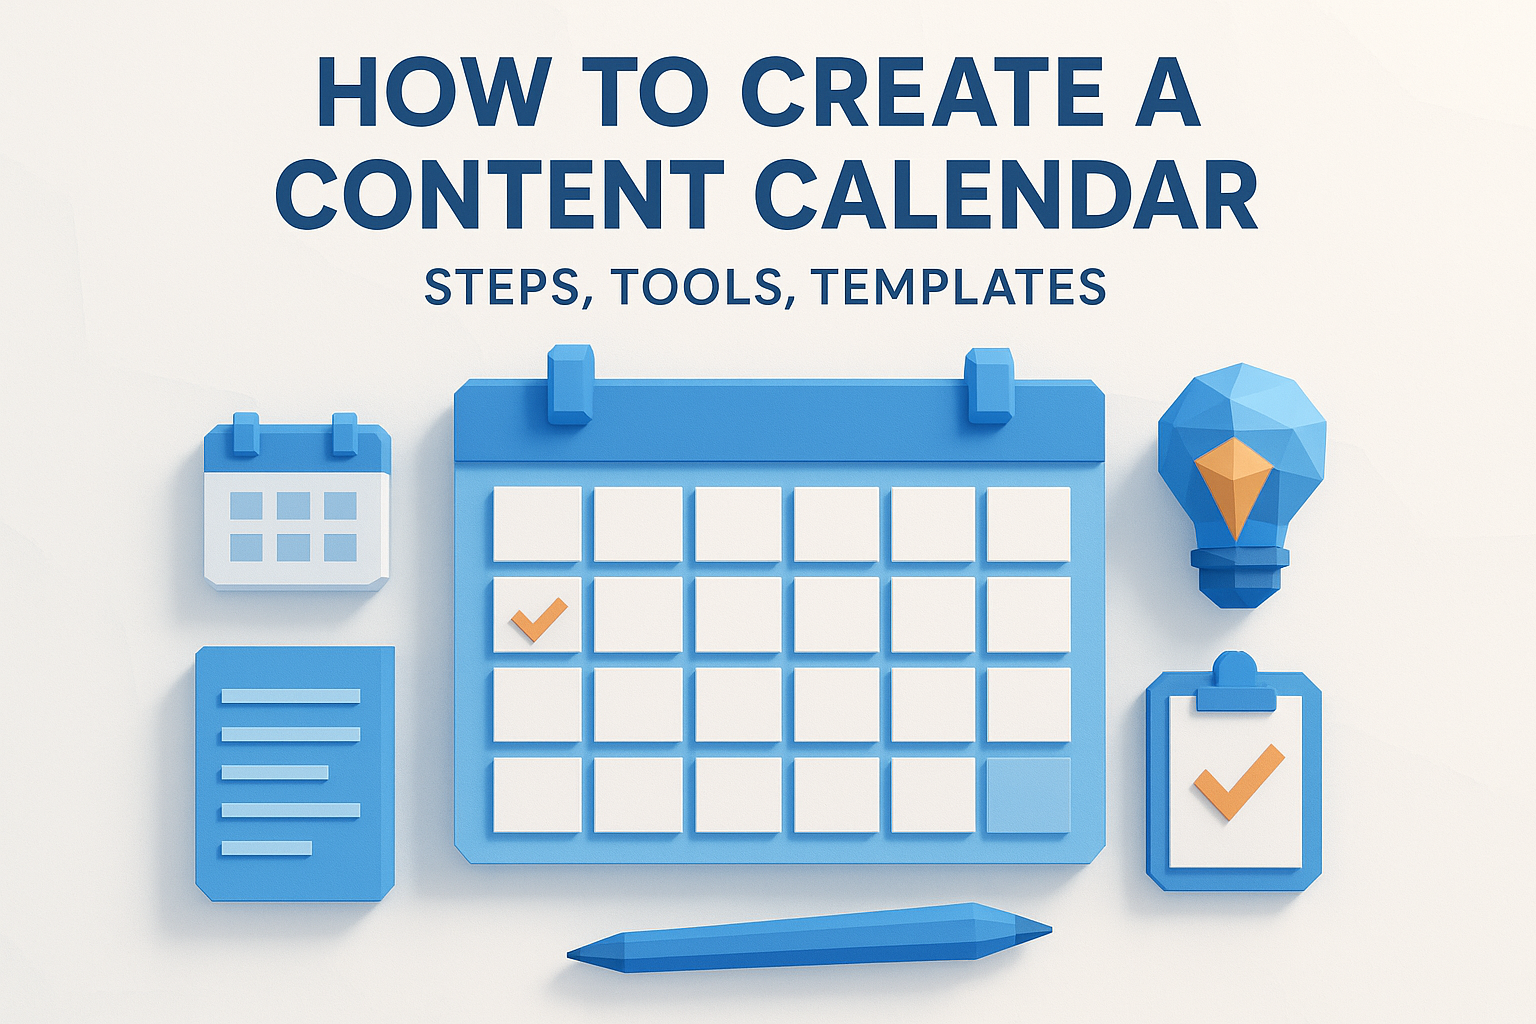
How To Create A Content Calendar: Steps, Tools, Templates
At AI Flow Chat
Contents
0%You have ten posts due this week across three platforms, a client waiting on a campaign draft, and zero idea what's going out tomorrow. Sound familiar? Knowing how to create a content calendar solves exactly this problem, it gives you a single source of truth for what gets published, where, and when. No more scrambling at 9 PM to write a caption you should've planned last Tuesday.
But most content calendar guides stop at "use a spreadsheet." That's fine if you're posting twice a week. It falls apart the moment you're repurposing viral videos into blog posts, running ads, and managing multiple brands. You need a system that handles the planning and the production, which is exactly why we built AI Flow Chat as a visual workspace where you can map out content, pull in reference material from social platforms, and generate drafts directly inside your workflow.
This guide walks you through building a content calendar step by step, from setting goals and choosing platforms to picking the right tools and templates. Whether you're a solo creator or running an agency, you'll walk away with a repeatable system you can start using today.
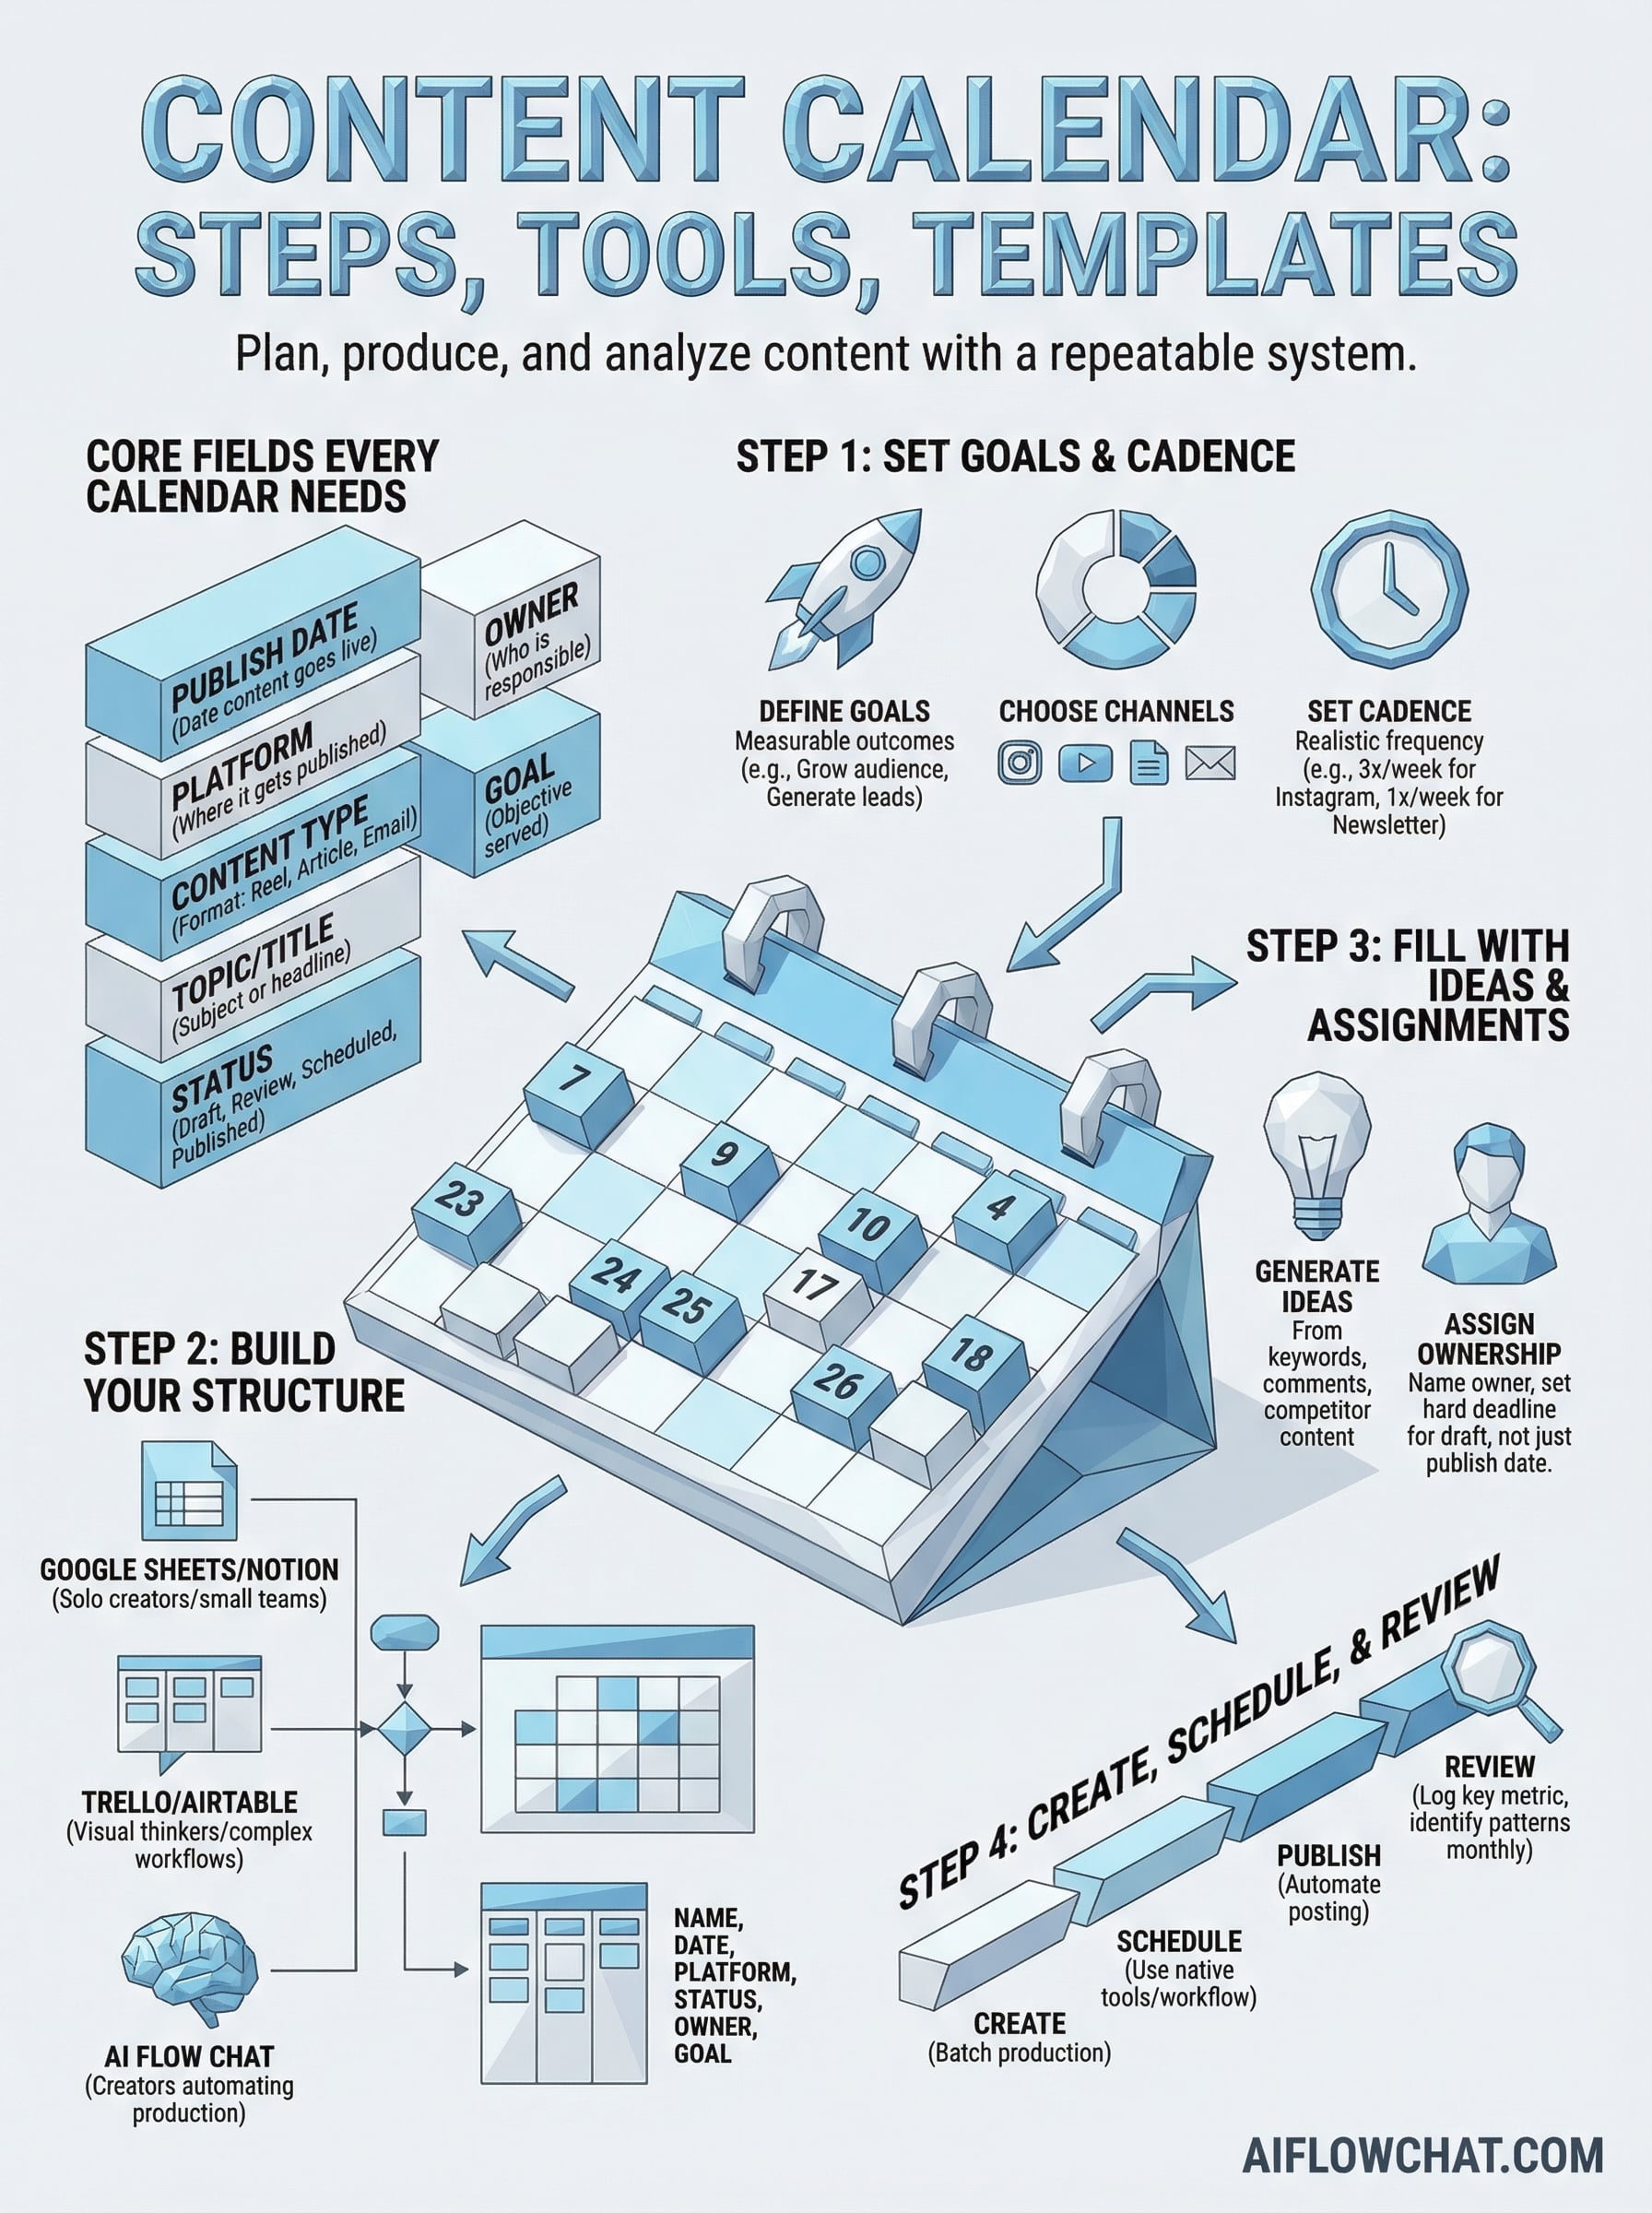
What a content calendar includes
A content calendar is more than a list of post dates. It's a living document that maps every piece of content to a specific goal, channel, format, and deadline, giving your whole team (or just you) a clear picture of what's in production at any given moment. Before you learn how to create a content calendar that actually gets used, you need to understand what goes inside it, because skipping key fields is what turns most calendars into abandoned spreadsheets within two weeks.
A calendar without the right fields is just a to-do list. The fields are what make it a system.
Core fields every calendar needs
Every functional content calendar shares a set of essential columns, regardless of whether you're a solo creator or a five-person agency. These fields answer three basic questions: what is the content, where does it go, and when is it due? Without all three, you're missing the structure that makes a calendar worth maintaining week after week.
Here's a starter template you can copy directly into a spreadsheet, Notion, or any project management tool:
| Field | Description | Example |
|---|---|---|
| Publish Date | The date the content goes live | March 25, 2026 |
| Platform | Where it gets published | Instagram, Blog, YouTube |
| Content Type | The format of the piece | Reel, Article, Email |
| Topic / Title | The subject or working headline | "5 hooks that drive saves" |
| Status | Current stage in the workflow | Draft, Review, Scheduled |
| Owner | Who is responsible for delivering it | Sarah (copy), Mike (design) |
| Goal | The objective this piece serves | Brand awareness, Lead gen |
Optional fields that sharpen execution
Once your core structure is in place, a few extra fields can significantly reduce back-and-forth between team members and give you data to learn from over time. These aren't mandatory, but each one solves a specific problem that surfaces as your content volume grows.
Consider adding these based on your workflow:
- Primary keyword: Critical for SEO content, keeps every article tied to a specific search term.
- Reference sources: Links to viral videos, competitor ads, or research you're drawing from, especially useful if you're pulling source material directly into your production workflow.
- Hook / angle: A one-line summary of the creative direction so the writer knows exactly what the content needs to do.
- CTA: The specific action you want the reader or viewer to take after consuming the piece.
- Repurpose from: If the piece is adapted from existing content, note the original source here to avoid duplicating effort.
- Performance notes: After publishing, log the key metric (views, clicks, conversions) so you can spot patterns at a glance.
These additional fields shift your calendar from a scheduling tool into an operational system that feeds both planning and analysis inside the same document.
Step 1. Set goals, channels, and cadence
Before you add a single post to your calendar, you need to answer three questions: what are you trying to achieve, which platforms will you publish on, and how often can you realistically post? Skipping this step is why most content calendars fail within the first month. Without clear goals and a sustainable cadence, you end up filling dates for the sake of filling them, and the calendar becomes a burden instead of a system.
Define your content goals
Your goals shape every decision that follows: the topics you choose, the formats you use, and the metrics you track. Each piece of content should map to at least one specific goal, whether that's growing your audience, generating leads, driving traffic to a product page, or building topical authority. If you can't name the goal for a given post, it probably shouldn't be on the calendar yet.
Vague goals produce vague content. Tie every content slot to a measurable outcome before you fill it.
Keep your goals simple and measurable. Examples that work well in practice:
- Increase organic traffic by targeting 8 new long-tail keywords per month
- Grow email subscribers through one weekly lead magnet post per platform
- Drive conversions with two product-focused posts per week tied to a specific CTA
Choose your channels and set your cadence
Once your goals are clear, pick only the channels that directly serve those goals. Adding every platform at once is how you create a content calendar that collapses under its own weight. Start with one to three platforms where your audience already spends time, then lock in a cadence you can sustain without burning out.
Use this as your starting point when deciding how often to post:
| Platform | Minimum Sustainable Cadence | Realistic Starting Point |
|---|---|---|
| 3x per week | 3x per week | |
| YouTube | 1x per week | 1x every 2 weeks |
| Blog / SEO | 4x per month | 2x per month |
| Email newsletter | 1x per week | 1x per week |
| TikTok | 3-5x per week | 3x per week |
Step 2. Build your calendar structure
With your goals and cadence locked in, you're ready to build the actual structure. This is where knowing how to create a content calendar that you'll actually use comes down to one decision: pick a tool you won't abandon, then set it up with the right columns from day one. A structure that's too complex gets ignored; one that's too simple breaks down the moment your volume increases.
The best content calendar is the one you open every Monday morning without dreading it.
Choose your tool
Your tool choice determines how flexible your calendar can grow. Each option below suits a different workflow, so pick based on how your team works, not what looks impressive in someone else's screenshot.
| Tool | Best For | Key Advantage |
|---|---|---|
| Google Sheets | Solo creators, small teams | Fast to set up, easy to share |
| Notion | Visual thinkers, agencies | Database views, flexible properties |
| Trello | Kanban-style workflows | Drag-and-drop status management |
| Airtable | Teams with complex workflows | Powerful filtering and linked records |
| AI Flow Chat | Creators automating production | Visual canvas connects planning to AI output in one workspace |
Start with Google Sheets or Notion if you're building your first calendar. Both are free, widely understood, and easy to restructure as your needs change.
Set up your columns and views
Once you've chosen your tool, build out your columns using the core fields from the previous section. Then create at least two views: a monthly calendar view so you can see your full publishing schedule at a glance, and a status board view so you can track what's in draft, review, or scheduled at any moment.
Here's a minimal Notion database setup you can replicate in under ten minutes:
- Name: Working title of the piece
- Publish Date: Date field with calendar view enabled
- Platform: Multi-select (Blog, Instagram, YouTube, Email)
- Content Type: Single select (Article, Reel, Newsletter, Ad)
- Status: Status field (Not Started, In Progress, Review, Scheduled, Published)
- Owner: Person field
- Goal: Single select tied to your goals from Step 1
Filter your board view by Status so you can immediately see everything stuck in "In Progress" and nothing slips toward a publish date unnoticed.
Step 3. Fill it with ideas and assignments
Your structure is ready. Now you fill it, which is where most people slow down or start posting random ideas that don't connect to any goal. The trick to learning how to create a content calendar that stays full is building a dedicated ideation habit, not waiting for inspiration to strike. Set aside 30 minutes each week to batch your ideas before you slot them into dates.
Generate ideas from proven sources
Random brainstorming produces random content. Instead, pull ideas from sources that already tell you what your audience wants: keyword research, comment sections on your best-performing posts, questions in forums, and competitor content that's getting traction. Each idea you add to your calendar should trace back to a signal, not a guess.
If an idea doesn't connect to a goal or a proven audience signal, it doesn't belong on the calendar yet.
Use this checklist before adding any piece to your calendar:
- Does it map to one of your goals from Step 1?
- Is there search demand or audience interest backing it?
- Do you have a clear angle or hook, not just a topic?
- Can you realistically produce it within your current workflow?
Assign ownership and deadlines
An idea without an owner is just a wish. For every piece on your calendar, name the person responsible and attach a hard deadline for the first draft, not just the publish date. If you're a solo creator, you're still assigning tasks to yourself, and writing them down forces you to be honest about your capacity.
Here's a simple assignment block you can add to each calendar row:
| Field | Example |
|---|---|
| Owner | Jamie (copywriter) |
| First Draft Due | March 22, 2026 |
| Review By | March 24, 2026 |
| Publish Date | March 25, 2026 |
Working backward from your publish date to set these interim deadlines keeps the whole pipeline moving without last-minute pressure.
Step 4. Create, schedule, and review
Your calendar is planned and assigned. Now the work happens, and this is where knowing how to create a content calendar pays off. You're not deciding what to make; you're executing against a clear plan. Your only job at this stage is to move each piece through its stages (draft, review, scheduled, published) without letting anything stall between steps.
Build a repeatable production routine
Pick two or three fixed windows each week for content creation, separate from your ideation and scheduling work. Batching creation time prevents context-switching and keeps you from writing one post per day at random hours. Treat these blocks the same way you'd treat a client call: non-negotiable.
Here's a sample weekly production schedule you can adapt:
| Day | Task |
|---|---|
| Monday | Write all first drafts due that week |
| Wednesday | Review and edit drafts, request revisions |
| Thursday | Finalize copy, add visuals, load into scheduler |
| Friday | Confirm all pieces are scheduled for next week |
Use a native scheduling tool for each platform, such as Meta Business Suite for Instagram and Facebook, or a connected publishing tool inside your workflow. The goal is to have everything scheduled by Thursday so Friday is a buffer, not a scramble.
Review performance and update your calendar
Publishing without reviewing is how you repeat the same mistakes for months.
After each piece goes live, log one key metric directly in your calendar row: reach, clicks, conversions, or whatever matters for that post's stated goal. You don't need a separate analytics dashboard at this point. Keeping the data in the same row as the content lets you spot patterns without digging through multiple tools.
At the end of each month, spend 20 minutes reviewing your calendar. Flag the top three performers, identify any formats that underdelivered, and carry those signals into your next planning session. This single habit is what separates a content calendar that keeps improving from one that just keeps existing.
Keep it running
Now you know how to create a content calendar that actually works, but the real challenge is maintaining it week after week. The system only delivers results if you treat it as a non-negotiable part of your workflow, not something you revisit when things feel chaotic. Block 30 minutes every Monday to update statuses, add new ideas, and confirm the week's assignments. That single habit keeps the whole machine moving without requiring a full rebuild every few weeks.
Your calendar will break occasionally. Posts get delayed, priorities shift, and some ideas just don't pan out. That's fine. Update the rows, adjust the dates, and move on without letting one missed post derail the entire schedule. The goal is consistency over perfection. If you want to speed up the production side and connect your planning directly to content generation, try AI Flow Chat to build visual workflows that take your calendar from plan to published draft faster.
Continue Reading
Discover more insights and updates from our articles
Writing SEO content without a clear brief is like building a house without blueprints, you'll waste time, miss key details, and end up reworking most of it. A good content brief generator takes the gu...
Every manual task inside your CRM, updating a lead status, sending a follow-up email, assigning a case to the right rep, costs time you could spend on work that actually moves revenue. Salesforce work...
Most people use "content strategy" and "content marketing strategy" interchangeably. They're not the same thing. The difference between them isn't just semantics, it affects how yo...